
This also allows you to run your console without a step-down convertor if you are in a country that has 240v electricity.
Our new power supply was designed so it uses less power, runs much cooler and safer compared to mains voltage.
The new power supply is a simple DIY installation that takes 10 minutes.
You also need to purchase a 12v 2-3a DC adapter, center positive, 5.5x2.5mm barrel size which can be purchased on eBay or Amazon.
Please take care when replacing as the original unit runs on mains supply and may still have some power stored.
Features
* Fused Auto-Resetting Input ProtectionIf something shorts out within the Console / Power Brick / PicoPSU, the fuse will blow to stop more damage from happening.
* Reverse Polarity Protection
If you accidently use the wrong external power brick, it won't damage the PicoPSU or Console.
* High Grade Polymer Capacitors
We have spent a great deal of money by using high grade KEMET polymer capacitors to ensure the lowest output ripple, highest reliability and highest possible capacitor life.
* MAXIMUM POWER!
The GDO-101MPicoPSU can provide up-to 2a per voltage rail meaning there's plenty of power for the system and plenty of mods.
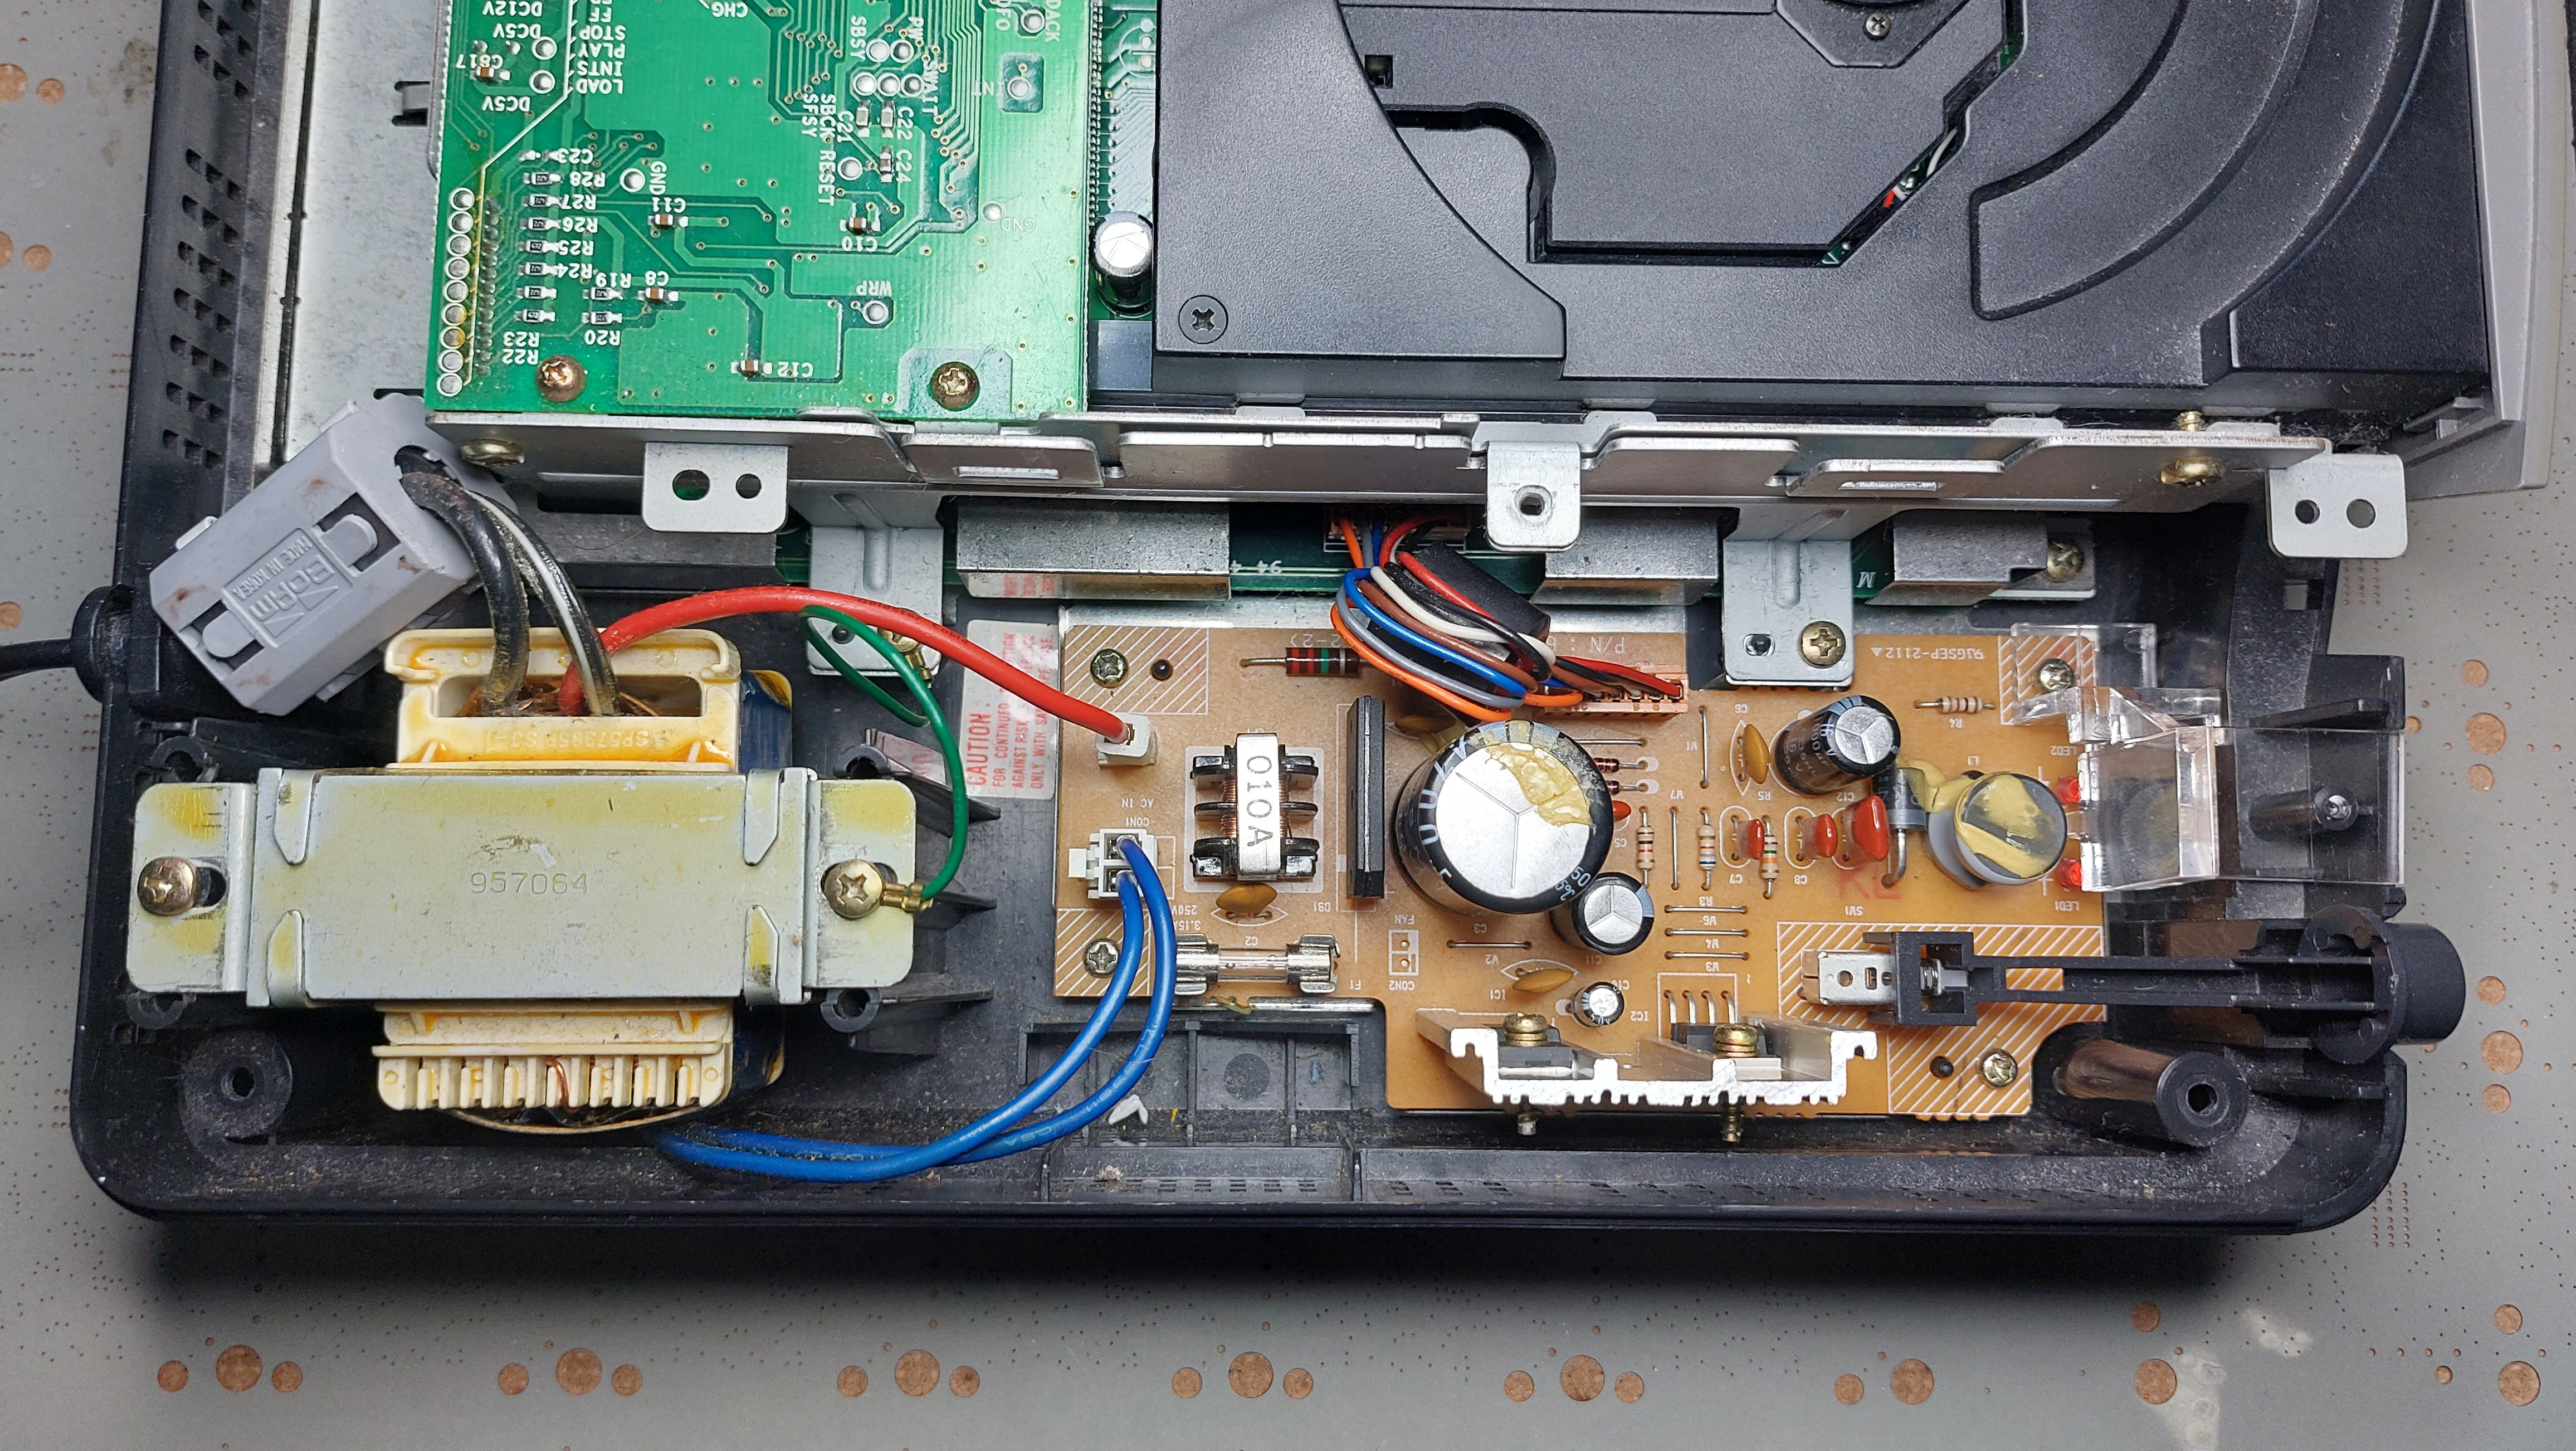
Installation - Part 1, Old PSU Removal
- Open the console by removing the 4 screws underneath and then take off the top cover.
- Remove the 2 screws holder the Transformer Block down shown on the left hand side.
- Disconnect the Blue and Red cables going to the Old Power Supply Board on the right.
- Lift and remove the Transformer Block out of the way.
- Disconnect the Brown Cable Loom that goes from the Old Power Supply Board to the Console Mainboard.
- Remove the 4 screws holding down the Old Power Supply Board.
- Set aside the Plastic Power Button and Clear Power LED Light Pipe.
- Finally, Remove the Single Green Wire Harness, making sure to put the screw back to hold down the Drive Mechanism.
Installation - Part 2, New PSU Installation
- Place the New Power Supply Board in the console shell, taking note of mounting holes.
- Install the Clear Power LED Light Pipe into the correct position.
- Use the 4 previously removed screws to screw down the new New Power Supply Board.
- Install the previously removed Plastic Power Button.
- Connect the Brown Cable Loom that goes from the Console Mainboard to the New Power Supply Board.
- Finally, Connect the DC Socket Loom to the New Power Supply Board and mount it as shown in the picture.
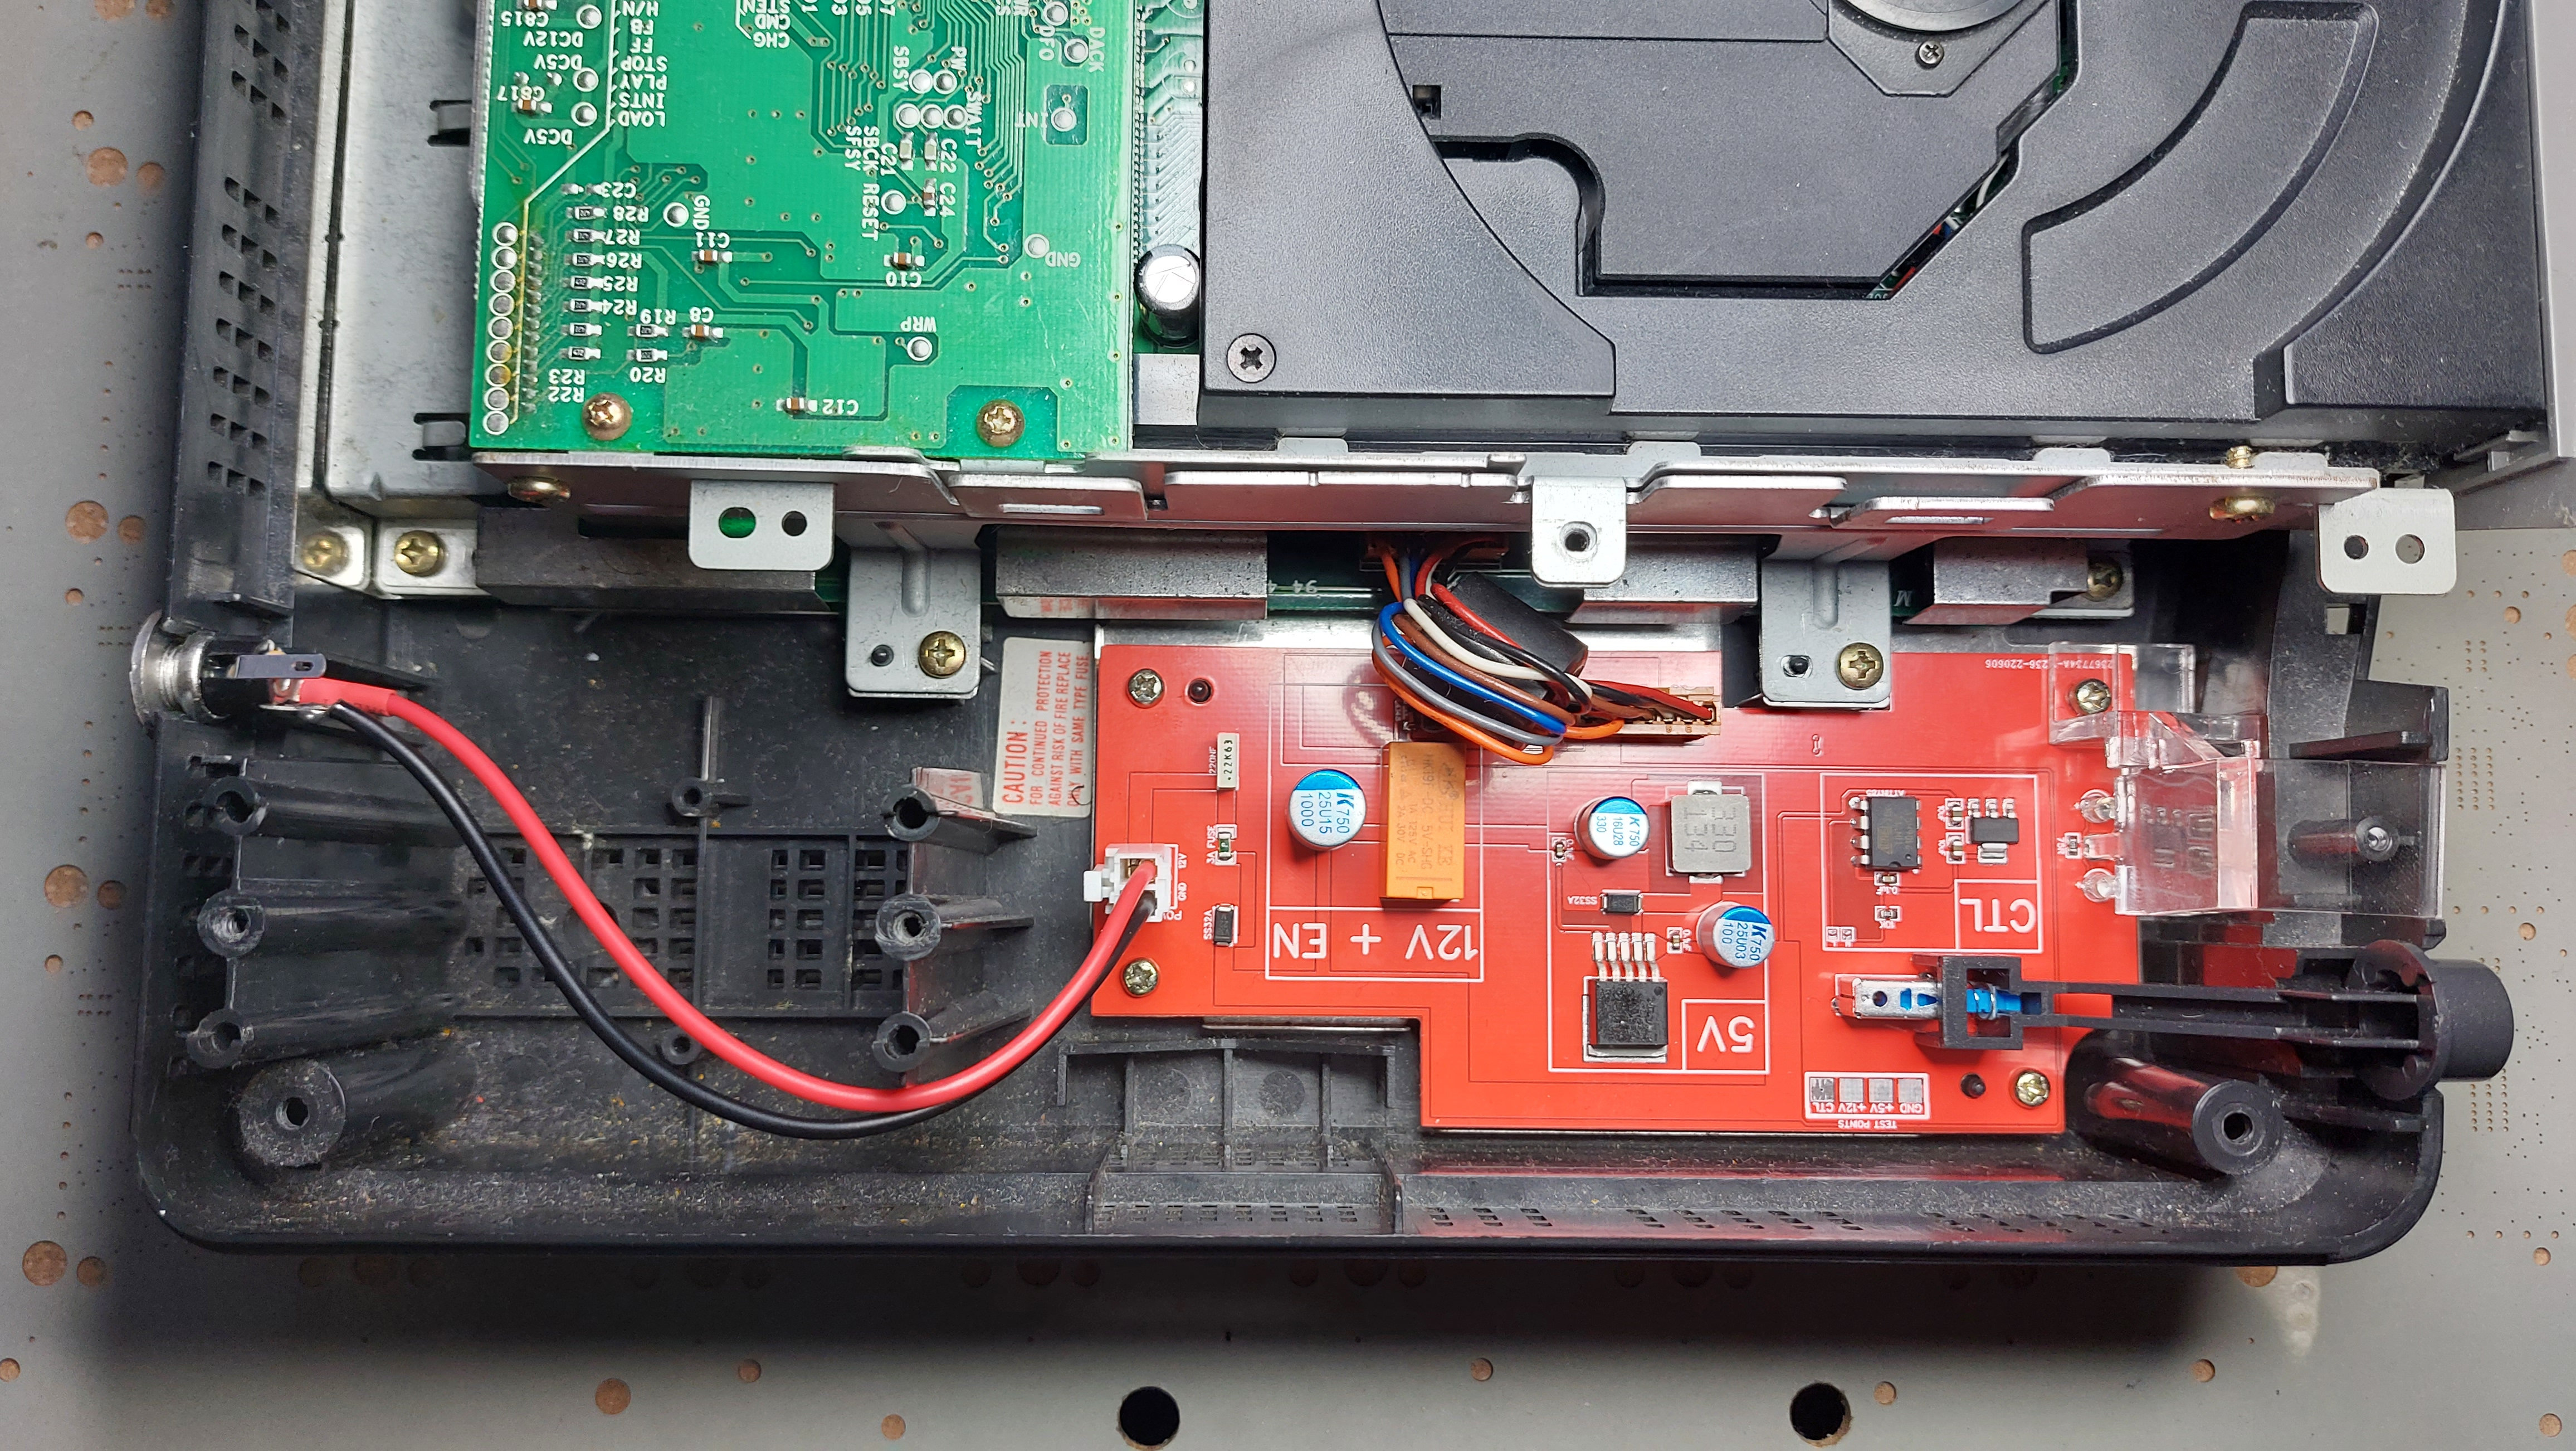
After installation, you should be left with the Transformer Block, 2 Long Screws, Old Power Supply Board and the Single Green Wire Harness.
Goldstar 3DO GDO-101M Replacement PSU - PicoPSU V1
- Product Code: 3DO GDO-101M Replacement PSU V1
- Reward Points: 38
- Availability: 9
-
£38.00
- Price in reward points: 380
Related Products

Apple IIe Replacement PSU
We have put together a drop-in replacement power supply for the popular Apple IIe / II+ / II europlu..
£80.00

Wii PSU to GC PSU Adapter
This is a small 3D Printed adapter so you can use Nintendo Wii PSU's on a Nintendo GameCube. This i..
£4.00

Sony Playstation 1 PS1 Replacement PSU - PicoPSU V11 Gold
The original power supply although quite reliable, it does generate huge amounts of heat and in so..
£35.00 £42.00

Sony Playstation 1 PS1 Replacement PSU - PicoPSU V12 Gold
The original power supply although quite reliable, it does generate huge amounts of heat and in so..
£42.00

NeoGeo CD Toploader Replacement PSU - PicoPSU V1
The original power supply although quite reliable, it is becoming incredibly difficult to source w..
£45.00